16 April, 2009

Tomorrow

The nerves have hit again. I have my next wedding to shoot tomorrow, and apparently I am doomed to spend every day before a wedding running around in fits of agitation and listlessness. I even feel like cleaning, just to do something. Hmm, actually, that's a good thing. I never feel like cleaning! Onward and upward, kitchen floor, bathroom floor, dishes, ironing and excessive tidying up!

Let's not get carried away. I'll probably be tired after the first floor.

So tomorrow's wedding is a semi-destination one, which means that Tanja and I will be sleeping over there. Man, I hope they have a good breakfast. I love hotel breakfasts. :-) Especially if they have tons of cut fruit. Om nom nom.

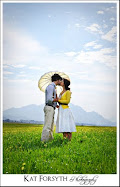
I realised that because I've been posting my own photos, this is no reason to stop my "Photo of the Day" series. So here's one from Stephanie Williams. It's a fashion shoot, not an actual wedding, but this picture might be the loveliest "bridal" I have ever seen in my life. I want to frame it, except that would be a bit...weird.

15 April, 2009

My first wedding!

Firstly, I need a new, proper photography blog. I'm in the process of organising it! I've asked Mr Ruby Slippers to design my logo (because he has art skillz), but he's having a bad time at work so I'm not rushing him. Why is it that one of us always has a miserable job? I just got out of mine, and now his has morphed into manager of shit at company McCrap. Anyway. I'm not in the hugest rush to get my own photography site because I am in no way ready to start advertising my skills as a solo photographer (I'm still a fledgling learning to fly), so I figured I'd put some photos from Saturday up here. Be gentle :-) I know full well that this is nowhere near where I want to be as a photographer. But we have to start somewhere.


Katlego was such a beautiful bride who made my job so easy. Put it this way: we saw her before she had her make-up on and I thought she already had.


The guys were such fun. The guy on the right looks uncomfortable because he didn't have his cufflinks so he couldn't pose properly. Oops.


Gorgeous.
Look at her eyes in the shot. Could she BE more excited?


Sweet moment between Katlego and her Maid of Honour after the service.


Thanks, Tanja, for letting my second shoot my first wedding with you! And thanks to the bridal party for being so awesome and to the Moon & Sixpence for being just as fabulous on Saturday as you were last year on my big day.

13 April, 2009

I breathed, I acted calm, I got through it...

My first wedding. Yikes. What an awesome rollercoaster. Despite some minor weirdnesses and one rather large mishap (more on that story later), I was totally lucky: firstly, to be working with Tanja, who shot my wedding last year, which was a huge help because I know how she works; and secondly, to be blessed with such a sweet, beautiful and graceful bride on my first wedding. Actually the whole wedding party rocked it out; those guys knew how to pose and strut their stuff! I've only just looked at the photos and started editing, but here's a fun teaser:

10 April, 2009

Photoshoot with Tanya & Cathy

On Monday, my friend Tanya Rudman (who is married to the brother of one of my oldest schoolfriends, and is a fab photographer to boot) was sweet enough to organise a friend of hers to come pose for us so that I could get the feel of shooting and directing people. That last bit was HARD, but I learnt a lot! Thanks so much, Tanya, for sharing your photographic and editing knowledge with me so willingly (and so well!). I love when people are happy to share the photography love.

My computer crashed on Tuesday, but luckily my clever computer nerd Mr Ruby Slippers managed to rescue most of my stuff, including the few pics I'd edited the night before and not backed up. Two days of agony waiting to edit some more, and I finally got stuck in yesterday. Here are a few from the shoot:


I couldn't decide if I preferred this in colour or b & w!


My absolute favourite:
Another non-decision...colour vs the lightest sepia...

Grungy McGrungerson:

Tell me Cathy doesn't look just like Scarlett Johansson in this picture:


And not a stitch of make-up on! I hate her:


Thanks, Cathy, for your time and your keeping still and looking gorgeous ability, and thanks Tanya for being awesome and helpful!

07 April, 2009

Huge, gigantic, ginormous news

News of Godzilla proportions, in fact.

(No, I'm not pregnant.)

I AM SECOND-SHOOTING TWO WEDDINGS THIS MONTH.

ONE OF WHICH IS ON SATURDAY. IN FOUR DAYS.

*Breathe Breathe Breathe*


I didn't say anything earlier because it wasn't set in stone, but here I am, completely and utterly new at this, going to point my camera at people on a very important day in their lives. Yikes.

Actually, though, I'm more excited than nervous! It's a daunting prospect but I'm so in love with the idea of doing it that I'm just thrilled! Ok, actually I'm bouncing back and forth between excited and nervous...wouldn't you be?

04 April, 2009

Making a photo work

Since I got my DSLR, I've started noticing that I have a tendency to overexpose my pictures. I don't know why; maybe they just look prettier on the little LCD screen that way. But when I get to my computer I discover excessively bright, flat colours, with all the texture gone, and blown-out whites. And this is really stupid of me because I know that it's easier to recover information from an underexposed photo than an overexposed one. My understanding is that once the light colours have blown out, they're gone for good, whereas if the darks are too dark, it's easier to "lift" them out (within reason). Anyway, I'm learning not to do it!

A friend of mine gave me some wedding photos her husband took on Our Day, some of which were completely overexposed. I tried and tried, but I couldn't rescue that glaring white blob that was my dress. If someone knows of a way to do this (she said hopefully), let me know!

So I decided if I wanted to "rescue" the photo and make it work at least a little, I'd have to try other methods. Not that this was actually necessary, you understand. I don't need this photo; I have lots of pictures of our cake cutting. But I had to try just for my own education :-)

Here's the original photo as I got it:


See how the white in my dress and veil, as well as the tablecloth (hello gorgeous not-blown-out damask runners!) are completely blown out? My arms aren't doing too well either, and neither is the cake, but I don't care about the latter. The less I see of that wreck the better; and besides, a cake doesn't really have texture so it's less noticeable that it's blown out.

My first job, I decided, was to crop as much of that awful white out of the photo as possible. Most of the bottom part of the table cloth could go, and so could the back of my dress and veil. And, of course, we had to get rid of that pesky arm on the left hand side!

After the crop:
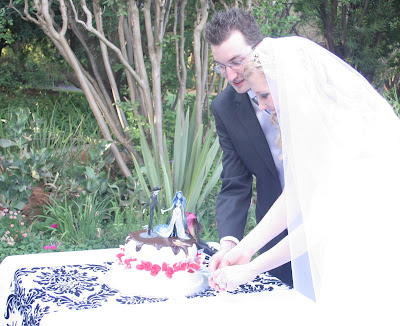
Then I had to try get as much as possible of the detail back into the white. I pushed down the contrast and the brightness:
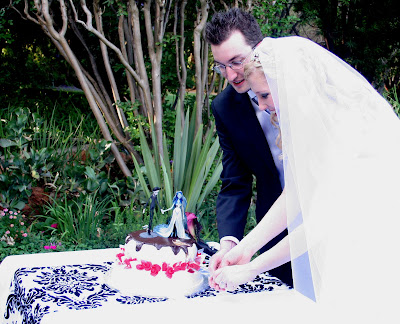

Yeah...not too much help, but I did get the photo crisper and less washed-out-looking, and I got a teeny-tiny bit of detail back in my hair! Hooray for small things, I suppose.

Next up I decided to make the photo sepia, using Pioneer Woman's sepia action. I just thought the blown-out veil and dress would be less garish. Here's the sepia:
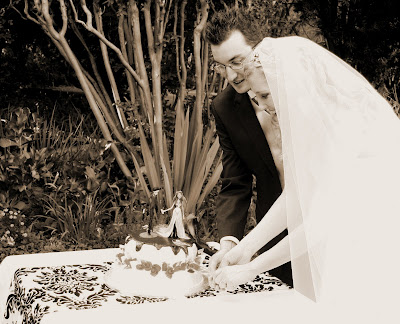

What's great about this particular action is that it runs as a layer mask automatically. I've just recently been introduced to the awesomeness of layer masks by the very same Pioneer Woman's blog. Her explanations of Photoshop are awesome and so easy to understand. Anyway, a layer mask is basically...well, imagine you laid a transparency over your original picture. In this case the transparency was sepia-tinted, so it made the picture look sepia. But the original picture is still untouched, in colour, underneath. So if we erase bits of the mask, it will show the colour beneath. This was probably entirely unnecessary, but I wanted to practise doing this, and since I love my Corpse Bride cake toppers so much I decided to take them back to colour. I suppose this does make them more of a focal point than, say, my overly white veil. So good.
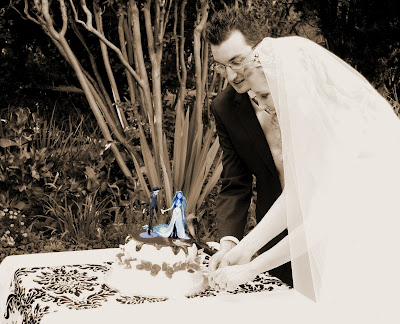

Since most of the white nastiness was at the edge of the photo, I decided to run an edge burn. This toned in well with the olde-worldy look of the sepia, and covered up a lot of the blowout:
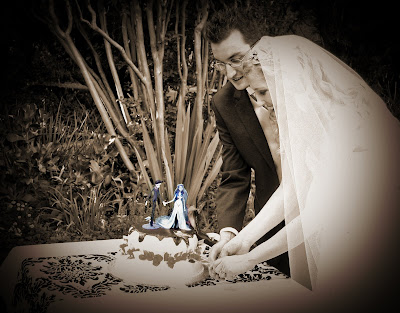
And, finally, I used another of Pioneer Woman's actions, Soft and Faded, to bring in just a bit more warmth and vintage softness:
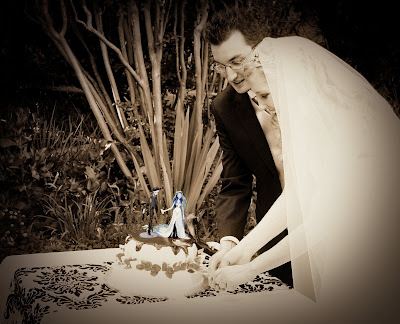

And there you have it! It's not a photo that's particularly nice, but at least I can live with it now, whereas before I would run away and hide my eyes behind a dark pillow.

BEFORE vs AFTER:
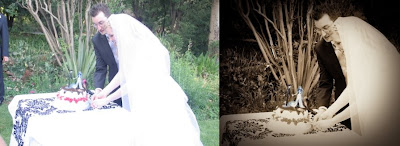

If this HAD been the only photo I had of my cake-cutting, I think I "saved" it passably...

03 April, 2009

Photoshopping pictures...

I was looking around on the website of one of my Photography Idols, Ed Pingol, and I discovered a section in his FAQ where he shows some of his before and after shots (ie Straight Out Of Camera and Post-Processed). Since I ADORE the way Ed's shots look, I decided this was the perfect opportunity to see if I could get my photos to look like his through editing. And the perfect way to try this was to use his "before" shots and see if I could get them looking the same as the "afters".

I'm showing Ed's before and after shot first, and then in each case I cropped the "before" picture and used that in photoshop to try get it looking exactly like Ed's "after" shot.


Do you see the problem I'm seeing? If not, good. Now tell me how talented I am.

If you do, and it's the same problem I'm seeing, it's that Ed's shots have a much prettier, softer, pinky tinge to them. Mine come more washed out and yellower. Look at the cake picture. The wall behind it should be pink, but mine is orange. The little girl (the result I'm least happy with) in picture 3 is a lot more, well, jaundiced than the pretty pinky girl she is in the real "after" shot. The shadow on the girl's chin in the first picture is far too yellow; the original pic has them quite pink; almost red in spots. And I've managed to wash out the colour in her face too.

I don't think my pics look BAD, but they're just not as pretty as they should be!

Photoshop for Dummies, here I come....