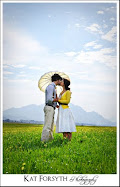
For a casual, outdoors wedding:
Or Weddingbee's Mrs Spider's fruity cuteness:
Or just plain elegant:
 This last idea really caught my eye. I loved the idea of the little cards hanging with sparkly crystals catching the light. Queen Bee on Bridesbuzzing did something similar.
So I narrowed down my search a bit more and found these:


Whoa. I just fell in love with that last one all over again. I knew I waaaanted it. In the words of Wayne Campbell: "It will be mine. Oh yes, it will be mine."
But there was a problem. I didn't want to have one table card for every person. Too much work, too much standing around while people try to find their card. Also I would definitely need something to hang seventy-plus cards onto, and our budget wasn't about to withstand a fake tree. Nor was my craftiness, which can only go so far. So I knew I had to have the hanging part, the crystals part, but not the individual names part. The answer? To have one hanging card per table, thereby bringing the total down to nine cards. I was still trying to figure out the best and most attractive way to do this, when THIS turned up on the blog of one of my favourite photographers, Andrea Carlyle. I've gushed about her before.
 It was like it was meant for me. The big crystal at the bottom is almost identical to the ones I'd been eyeing at Flowerspot in Woodmead. So without further ado, I present to you my DIY table listings!
I bought white A4 card, and cut it in half. Then I cut a loooong piece of fishgut and hung the biggest crystal (I bought three sizes) on the end. The cat is optional, but cute. :-)
I didn't like the way the width of the hole in the crystal was causing the doubled-up fishgut to separate like that, so I reworked my plans and put a small bead above it to hold it together. I then had to hold it down with a crimp.


And that's as far as I can get for now, because the table seating lists can only be put together once I get all my RSVPs and once I decide who sits where. What we are doing, though, is having the list one one side, with a damask border (of course), and the picture of the classic actor or actress whose table it is, on the other side. Hopefully these will twist and turn a bit as they hang there (we're hanging them from beams just outside the reception hall) so people will see both sides!


LOVE IT! I posted you idea on my blog as inspirations. Just adore it.
ReplyDeleteWow, thanks so much!
ReplyDeleteThese are going to look gorgeous, and I love that you will get the hanging crystals, without the confusion that people have to wade through in trying to find their name hanging from the tree.
ReplyDeleteWhere did you find these crystals?? The idea is so beautiful!
ReplyDeleteHi Austin, Thanks so much! I just bought them at a beadshop - they're not real or anything! :-)
ReplyDelete